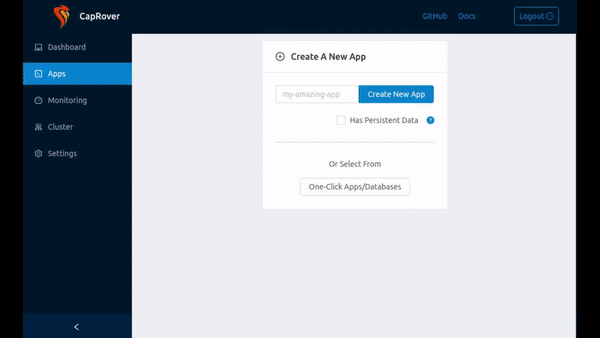
One-Click Apps
CapRover has built-in support for several popular apps that can be deployed as is. These include WordPress, MySQL, MongoDB and many more.
There is a repository of One Click Apps on GitHub and it's continuously growing.
Databases and Database GUI
- MongoDB
- MongoExpress
- MsSQL
- MySQL
- Redis
- PhpMyAdmin
- PostgreSQL
- Adminer
- Apache CouchDB
- Gitea
- ElasticSearch
- And many more...
Blogging and Content
- WordPress
- Ghost
- Prisma 1
- Strapi
- Minio
- And many more...
Dev Tools
- Jenkins
- Drone.io
- Hasura
- Nexus3
- Many more...
Other Apps
- Parse
- NextCloud
- Rainloop
- Thumbor
- OhMyForm
- And many more...
Thanks to @8byr0, we have a community maintained directory of apps. You can view the source code here.
What about other apps?
Just because an app or database is not available as a one click app, it doesn't mean that you can't deploy it. All you need to do is to search for the Docker image of the app that you're looking for. For example, before NextCloud was available as a one click app, you could still deploy it manually like this
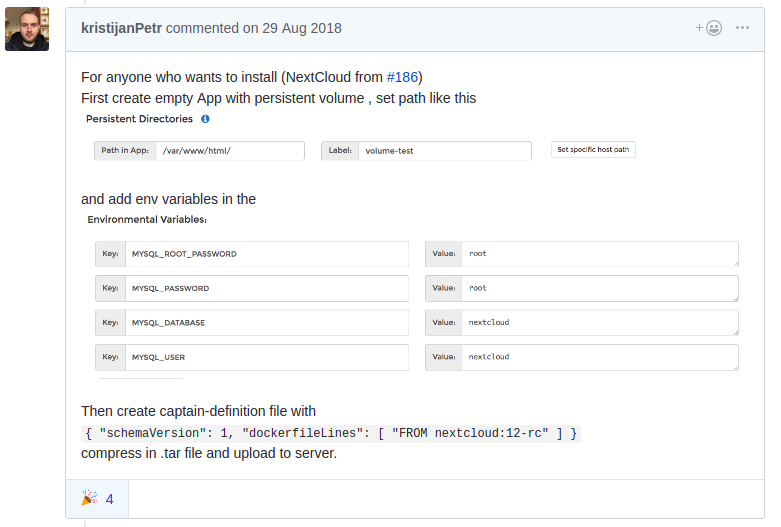
With CapRover v1, it's even easier than the method explained above. Since captain-definition now supports imageName. You can copy and past this into the deploy section of an app that you create. No more tar file creation is needed when all you need is imageName:
{
  "schemaVersion": 2,
  "imageName": "nextcloud:12-rc"
}
All the environment variables that you can set are listed on their DockerHub page: https://hub.docker.com/_/nextcloud/
Configuration Settings
They all come with pre-configured settings, however, you'll be have the option to customize the settings. For example, MySQL database uses port 3306, but you can change this port to another port if it suits your needs.
It is important to mention that some of these configuration parameters, might show up as environment variables in your app settings after you deploy the app, however, their values only being used in the installing phase. i.e., changing password of MySQL through changing the PASSWORD environment variable will not work. Instead, you should use MySQL commands to change the password. The PASSWORD environment variable is being used to set up the original password during the installation phase.
Upgrading One Click apps
So you deployed your one click app and sometime later a new version comes out and you want to update your app. The process is different for different apps:
Simple Image Update
Most good quality apps allow you to simply update the underlying image and that's it! This usually the case for most application. For example, if you have a MySQL 5.5 and you want to upgrade to 5.7, you can simply go to the "Deployment" tab, navigate to the bottom and under Method 6: Deploy via ImageName just type in mysql:5.7 and click deploy!
The image names are usually in imagename:version format or account/image:version format. You can look at the image that have been deployed by CapRover under the deployment history. Also you can look at the new versions at DockerHub. For example,
mysqlversions can be found from here: https://hub.docker.com/_/mysql?tab=tagsportainer/portainerversions can be found from here: https://hub.docker.com/r/portainer/portainer/tags
Note that there are other use cases where CapRover modifies the original image to provide more functionality. For example, redis container is modified to provide authentication option. In this case, it's easier to simply delete your app and recreate it. If your app has persistent data, make sure NOT TO REMOVE the volume when deleting the app and make sure to recreate the app with the exact same name so that the exact same volume will be attached to the app.
Other cases
Some apps have a different way of upgrading, specifically if they have persistent code data. WordPress is a good example. To upgrade WordPress, all you need to do is to perform upgrade from within the wordpress website panel itself. Sometimes on top of that, you need to upgrade the underlying image, in that case, just follow the guide above.
Connecting to Databases
Connecting Within CapRover Cluster
Note that since all these applications are Docker containers, you can have multiple MySQL databases on running on port 3306 without having any conflict. If you want to connect to two different MySQL databases, from a PHP app, where both PHP and MySQLs are under the same instance of CapRover, you can use srv-captain--mysqlappname1:3306 and srv-captain--mysqlappname2:3306.
Connecting Remotely
However, if you want to connect to your database from a remote machine (e.g. your laptop) you need to map a container port to a server port. In that case, you have to map two different ports on the server, for example:
- Port 1001 of the server goes to mysql-1 port 3306
- Port 1002 of the server goes to mysql-2 port 3306
Port mapping is needed if you want to connect to a database from a remote machine. You can read more about it Captain Configuration - Port Mapping.
After port mapping, you can enter these values for your Database Client:
- Host: IP-ADDRESS-OF-SERVER
- Port: MAPPED-PORT-ON-HOST
For example, in the example explained above, MAPPED-PORT-ON-HOST is 1001 for mysql-1 and 1002 for mysql-2.
Assuming your server ip is 123.123.123.123 and your mapped port is 9999:
- For Mongo DB, you would use
mongodb://dbuser:dbpassword@123.123.123.123:9999/dbname - For MySQL, you would use
HOST: 123.123.123.123,PORT: 9999 - and etc...
IMPORTANT: After port mapping is done make sure to open the server port. For example, if you mapped port 4444 of your host (server) to port 3306 of your container, you need to run the following command:
ufw allow 4444