Build, Test and Deploy from GitHub
Deploying directly from Github
This example showcases a Vue 3 app with a PHP backend that can be built, tested and deployed directly from Github to CapRover using the CapRover community-maintained GitHub Action. Feel free to clone an example project from https://github.com/PremoWeb/SDK-Foundation-Vue to try things out or build your next awesome app.
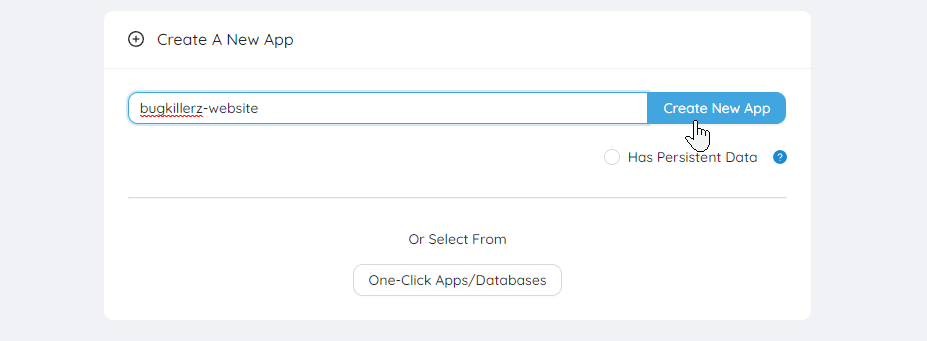
Create a new App
The name you choose here will become the APP_NAME secret.

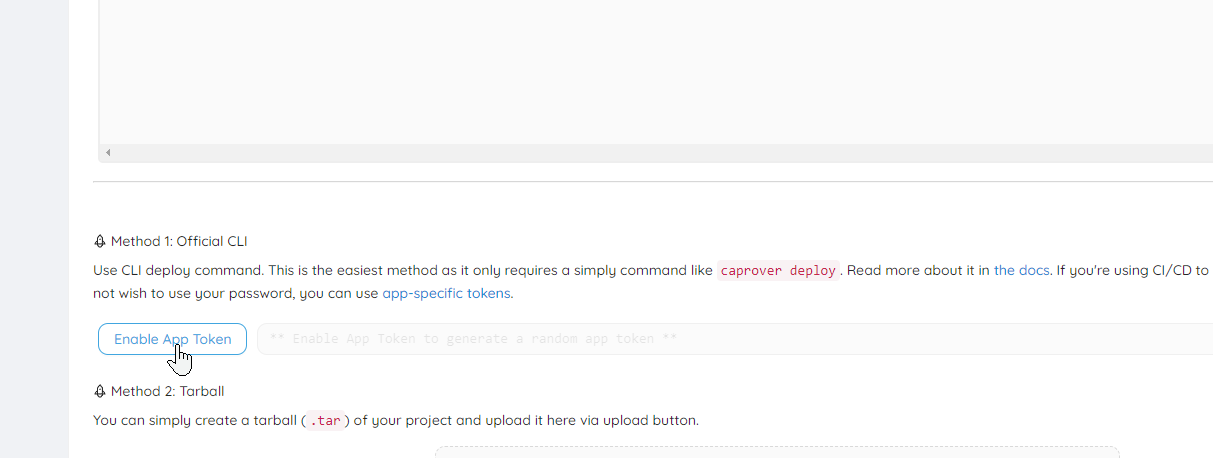
Enable App Token
Find the "Deployment" tab for your new app, click Enable App Token and copy this token. This is your APP_TOKEN secret.

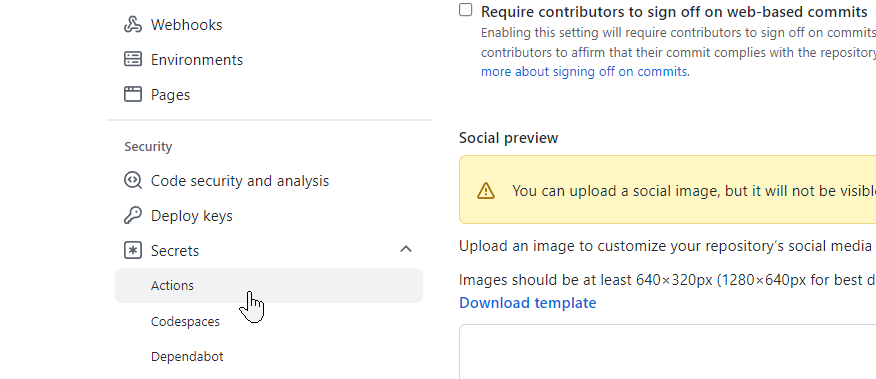
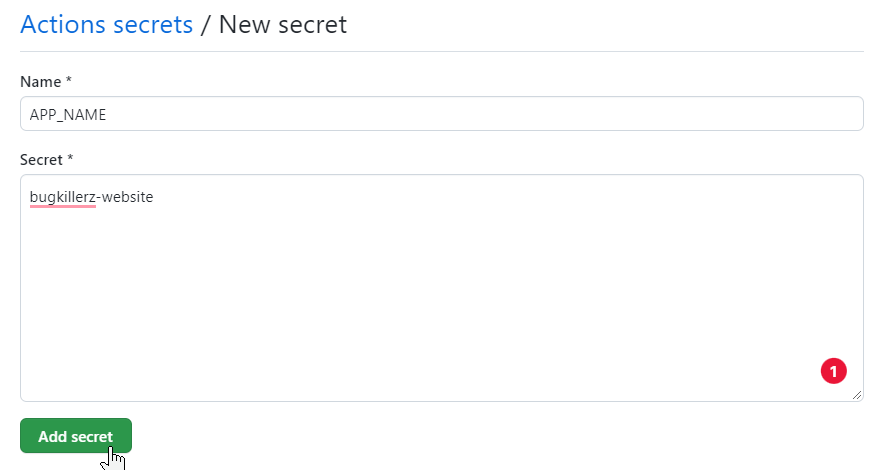
Add the Github Secrets


Repeat the process for your APP_TOKEN and CAPROVER_SERVER secrets.
NOTE: CapRover server must be in the format of "https://captain.apps.your-domain.com". You can set CAPROVER_SERVER as a Global Secret for all your private and/or public projects.
Add files to project
You will need at minimum, two files to deploy to CapRover using this method.
The first file will be your captain-definition file used by CapRover when deploying your app. The other file is a workflow yaml file that Github Actions will use to process your project prior to deployment.
Contents of our new Workflow file to be saved at .github/workflows/deploy.yml:
name: Build & Deploy

on:
  push:
    branches: [ "main" ]

  pull_request:
    branches: [ "main" ]

jobs:
  build-and-deploy:
    runs-on: ubuntu-latest

    strategy:
      matrix:
        node-version: [18.x]

    steps:
      - name: Check out repository
        uses: actions/checkout@v4
      - name: Use Node.js ${{ matrix.node-version }}
        uses: actions/setup-node@v3
        with:
          node-version: ${{ matrix.node-version }}
          cache: "npm"
      - run: npm ci
      - run: npm run build --if-present
      - run: npm run test --if-present

      - uses: a7ul/tar-action@v1.1.0
        with:
          command: c
          cwd: "./"
          files: |
            backend/
            frontend/dist/
            captain-definition
          outPath: deploy.tar

      - name: Deploy App to CapRover
        uses: caprover/deploy-from-github@v1.0.1
        with:
          server: '${{ secrets.CAPROVER_SERVER }}'
          app: '${{ secrets.APP_NAME }}'
          token: '${{ secrets.APP_TOKEN }}'
A quick breakdown of what you are seeing above:
The first step is to check out and build the Vue 3 frontend part of the app using NPM. The output of the build will be located in frontend/dist/. If present, the app would have also been tested prior to the second step.
The second step copies the backend/, frontend/dist/ directories and the captain-definition file into a deploy.tar file.
The last step will send the tarball file to CapRover so that CapRover can begin to deploy your app.
Commit changes to your code to deploy!
When you commit files to your project's repo on the "main" branch, Github Actions will kick off the processing of your Workflow file and upon completion, you'll see your app deployed to Caprover within just a few seconds! Any errors seen by Github will automatically fire an email letting you know. No emails means a successful deployment!
Alternative method (more efficient)
Alternatively, you can even build the Docker image on Github and just deploy the built artifact to your CapRover instance. This will help as it does not consume RAM and CPU from your CapRover instance to build your image.
In order to achieve this we will need to take the following steps to build the Docker image using GitHub Actions, store it using GitHub Packages, and then deploy it to CapRover.
Create a GitHub Personal Access Token
You will need to create a GitHub Personal Access Token with write permission for packages.
GitHub has a great guide on creating a personal access token if you have not before. Here is the link: https://docs.github.com/en/authentication/keeping-your-account-and-data-secure/creating-a-personal-access-token
Create a New App
If you do not have an app already on CapRover, create one using the instructions here
If you do already have an app on CapRover you can skip this step.
Enable App Token
If you do not already have an app token for your app, create one using the instructions here
If you do have an app token, keep it handy as we will need it in the next step.
Add The GitHub Secrets
You will need to add the following information into GitHub Secrets:
- App Name: Name of the app in CapRover
- App Token: App token we got in the previous step
- CapRover Server URL: URL of your CapRover Server
- GitHub Token: GitHub Personal Access Token you created in previous step
You can add GitHub Secrets using the instructions here
Add a private Docker Registry to CapRover
In order to pull the image from GitHub Packages, you will need to add a private Docker registry to CapRover. If you haven't done this before, you can do this by following the instructions here
Use these values:
- Username:
<your github username> - Password:
<your github personal access token> - Domain:
ghcr.io(no www, no http) - Image Prefix:
<your github username or your org username>(if you're pulling images from an org different than your username)
If your image prefix is your github username, your prefix MUST BE lowercase
Create the GitHub Action
GitHub Actions is the CI/CD pipeline built into GitHub. If you are unfamiliar with it, it would be beneficial to learn the basics by reviewing GitHub's Understanding GitHub Actions Docs: https://docs.github.com/en/actions/learn-github-actions/understanding-github-actions
Here is an example GitHub Action that builds a docker container on each push to a pull request and deploys it to the CapRover server (good example for a development environment set up)
name: Build and Deploy Docker Image

on: [pull_request]

jobs:
  build_and_deploy:
    runs-on: ubuntu-latest

    steps:
    - name: Check out repository
      uses: actions/checkout@v4

    - name: Set up Docker Buildx
      uses: docker/setup-buildx-action@v3

    - name: Login to Container Registry
      uses: docker/login-action@v3
      with:
            registry: ghcr.io
            username: ${{ github.repository_owner }}
            password: ${{ secrets.GITHUB_TOKEN }}

    - name: Preset Image Name
      run: echo "IMAGE_URL=$(echo ghcr.io/${{ github.repository_owner }}/${{ github.event.repository.name }}:$(echo ${{ github.sha }} | cut -c1-7) | tr '[:upper:]' '[:lower:]')" >> $GITHUB_ENV

    - name: Build and push Docker Image
      uses: docker/build-push-action@v5
      with:
        context: .
        file: ./Dockerfile
        push: true
        tags: ${{ env.IMAGE_URL }}

    - name: Deploy Image to CapRrover
      uses: caprover/deploy-from-github@v1.1.2
      with:
        server: "${{ secrets.CAPROVER_SERVER }}"
        app: "${{ secrets.APP_NAME }}"
        token: "${{ secrets.APP_TOKEN }}"
        image: ${{ env.IMAGE_URL }}
Here is a quick explanation of what each step in the action does:
- Check out repository: This step uses the action
actions/checkout@v2, which is a predefined GitHub Action that allows the workflow to access the contents of the repository. The checkout action will clone the repository onto the runner (the virtual environment that GitHub Actions uses to execute workflows), so all the subsequent steps in the workflow can operate on it. - Set up Docker Buildx: This step uses the action
docker/setup-buildx-action@v1, which is a Docker action to set up Docker Buildx. This allows for more advanced container building capabilities. - Login to Container Registry: This step uses
docker/login-action@v2to log into the GitHub Container Registry (ghcr.io) using the repository owner's username and a GitHub Token (GITHUB_TOKEN). This token must have been previously stored in the repository's secrets. - Preset Image Name: This is a shell command that constructs the URL for the Docker image. It uses the GitHub repository owner, the repository name, and the SHA of the current commit (truncated to the first 7 characters) to construct a URL, converting all upper-case characters to lower-case, and then writes this URL into the
GITHUB_ENVso it can be used by subsequent steps as an environment variable. - Build and push Docker Image: This step uses
docker/build-push-action@v4to build the Docker image using the Dockerfile in the repository and pushes it to the GitHub Container Registry at the URL that was set in the previous step. Thecontext: .setting indicates that the build context is the current directory (i.e., the root of the repository). - Deploy Image to CapRover: This step uses
caprover/deploy-from-github@v1.1.2action to deploy the Docker image that was just built and pushed to CapRover. The details of the CapRover server, the application name, and an access token are provided from the repository's secrets. The Docker image URL is taken from the environment variable set earlier.
Deploy!
After these changes are implemented commit + push them to your repo and watch the magic happen 🪄
Need help?
Commercial and community support is available. Please visit the Help and Support page for details.
